Onboarding for Dynamics 365 Nonprofit Accelerator
Prerequisites to installing the RaiseNow Fundraising Kit for Dynamics 365 Non Profit Accelerator
Install Dynamics 365 Nonprofit Accelerator
You need to install the Dynamics 365 Nonprofit Accelerator from the AppSource. Please refer to the documentation provided by Microsoft for further details on this.
Complete RaiseNow Growth On-Boarding
The RaiseNow Digital Fundraising Kit for Non-Profit Accelerator is offered as part of our Growth license. You must have purchased this license and completed the initial onboarding in order to link RaiseNow to Dynamics. During the on-boarding please notify our customer success team that you wish to connect RaiseNow to the Dynamics 365 Nonprofit Accelerator.
Setup Access
RaiseNow needs programmatic access to your D365 organization. For this purpose an application user must be setup.
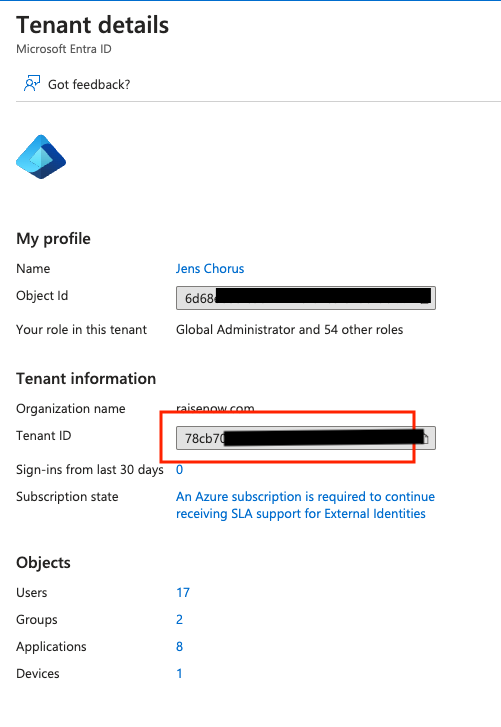
Finding your tenant_id
The tenant_id is widely used and can be found in different places.
- Navigate to Microsoft Azure-Portal
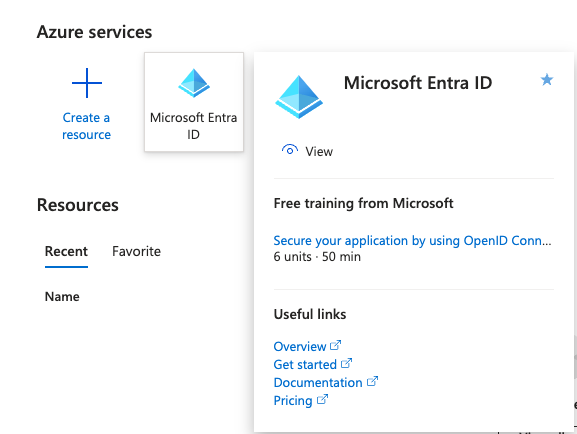
- Select Microsoft Entry Id
- Go to Manage Tenants
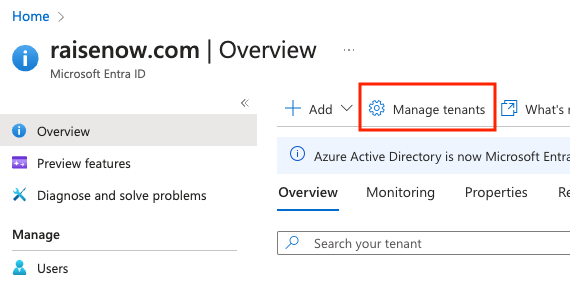
- Selecting the tenant from the list will give you the tenant details, including the tenant_id
Registering the App
- Go to your Azure portal and register a new app in the Azure Active Directory
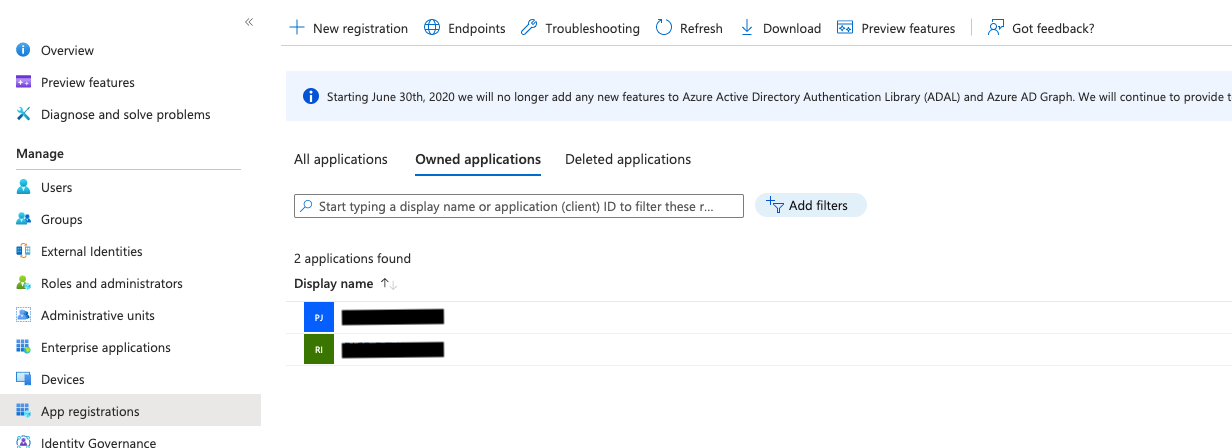
- Be sure the setup the following with:
- The authentication mechanism selected during the app registration should be client credentials. Please note, that when defining the secret, you have to specify an expiration date for that secret. Updating the secret is a manual process that needs to be repeated before the defined expiration date.
- Dynamics must be accessible by the application via Web

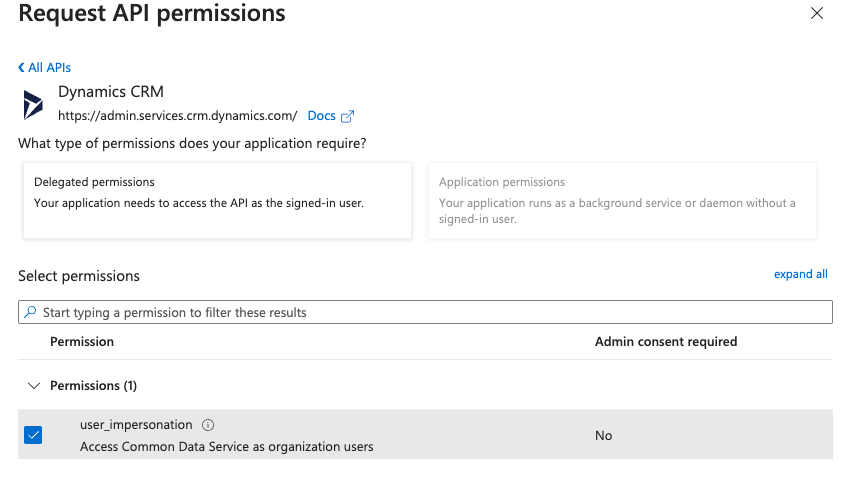
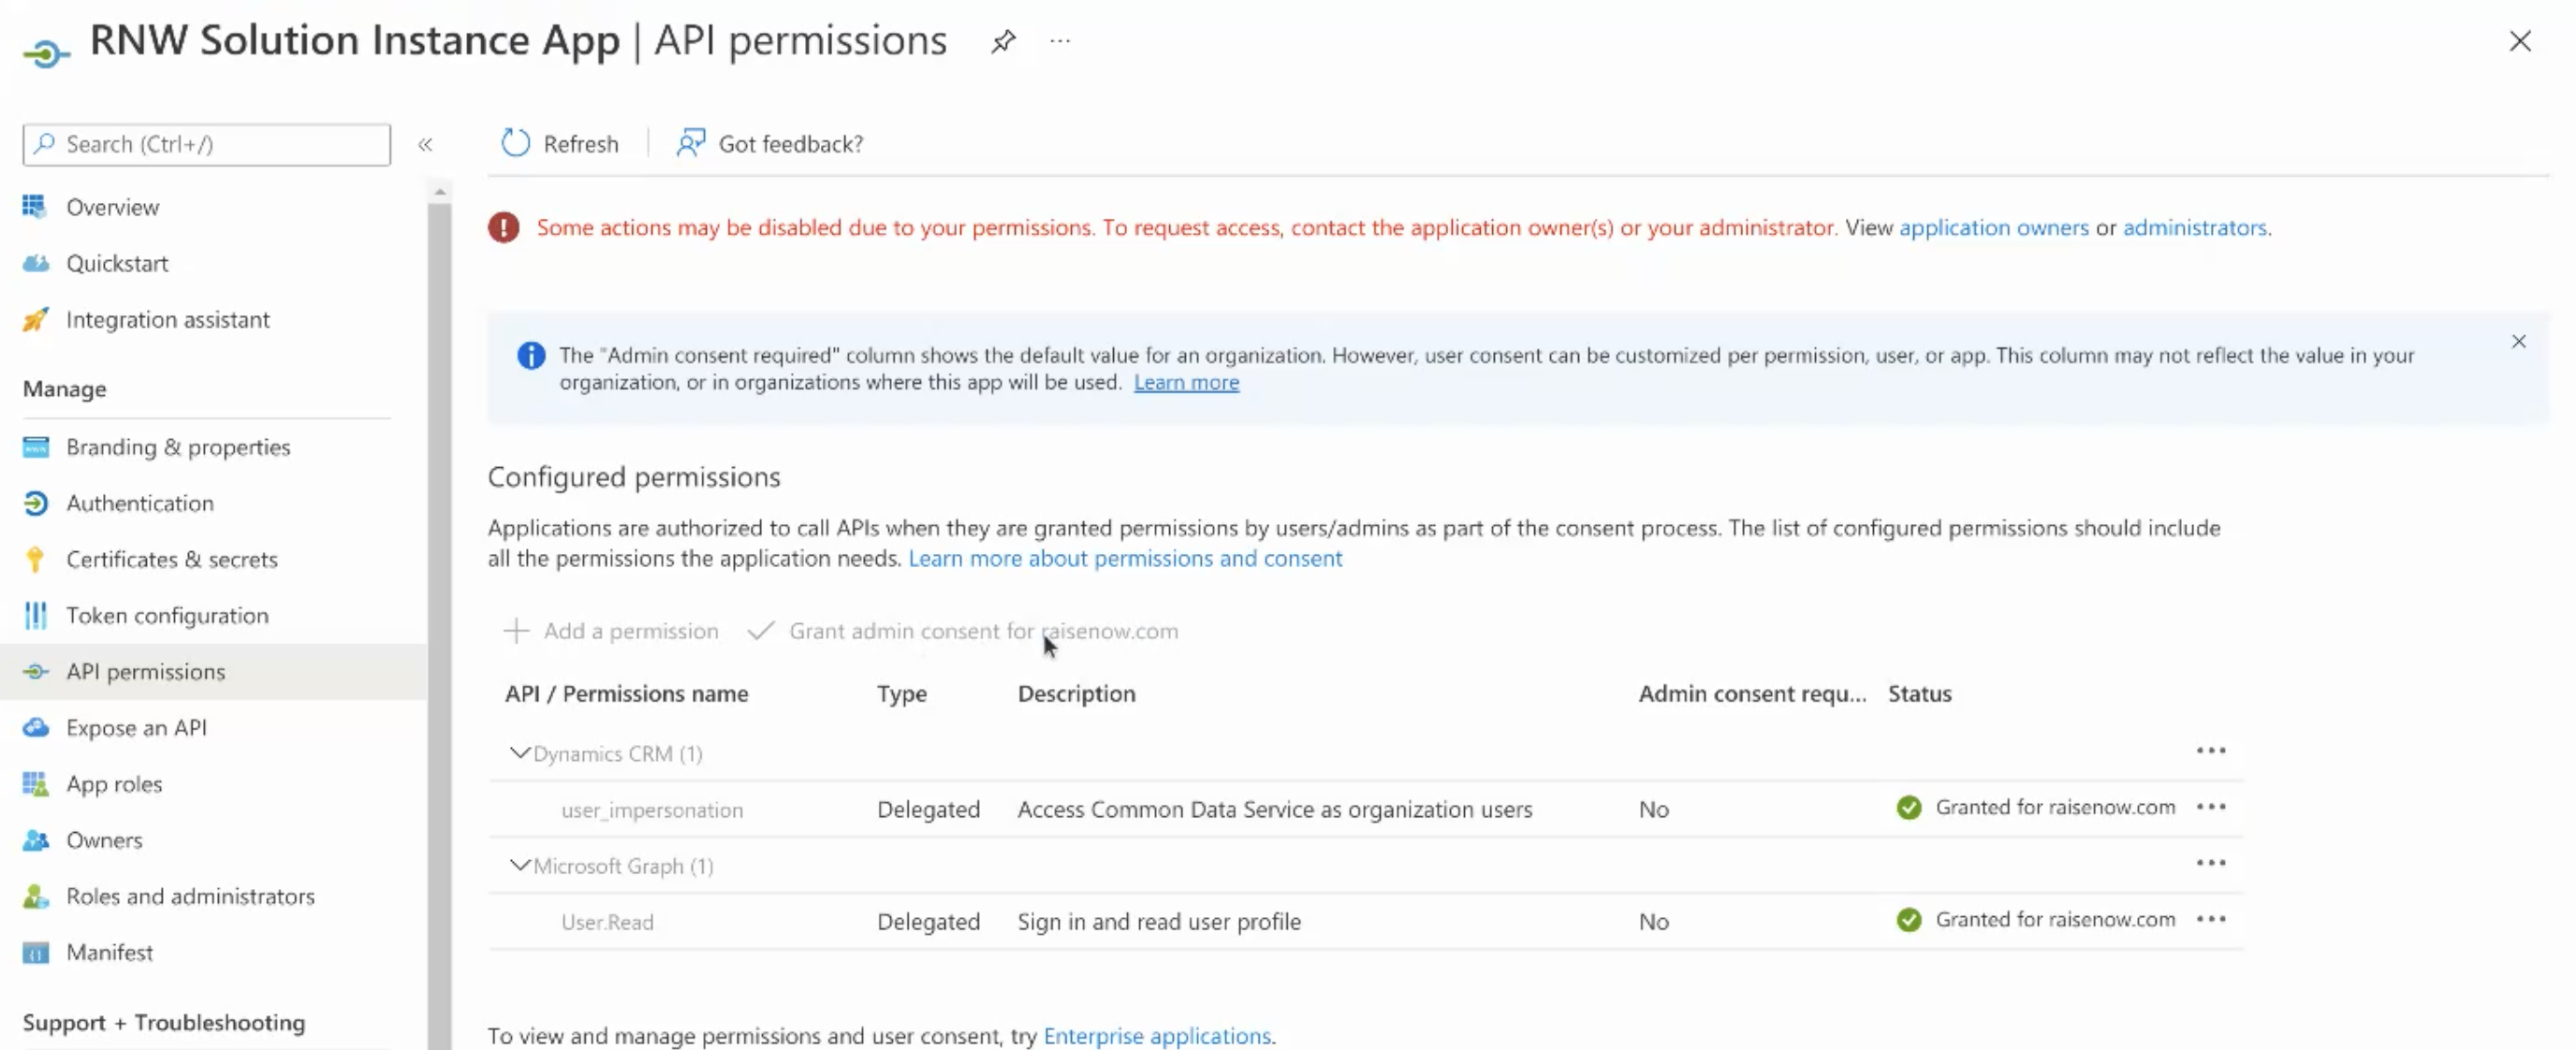
- API permissions must be set as shown in the screenshots below to give access to common data services for Dynamics CRM
Configure Access in Dynamics
- Configure Access in Power Platform Admin Center
- In the Power Platform Admin Center, navigate to your environment
- Manage Users
- Switch to App Users
- Add User
- Search for the app registration you created above in Azure Entry ID and add that user
- Be sure to add roles to the application user as required by your use case.
- Configure Access in Dynamics CRM (legacy)
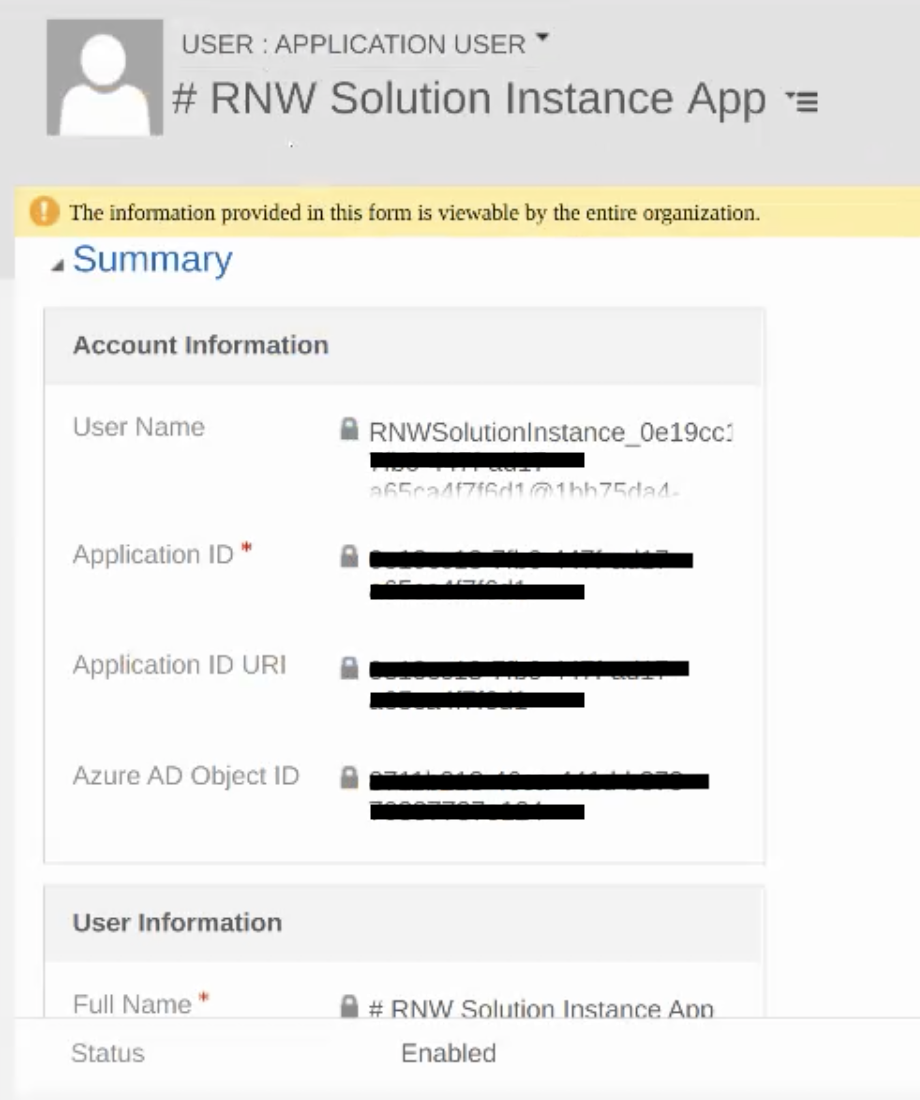
- In your dynamics environment, a new application user must be created and linked to the application registered in Azure.
Import the RaiseNow Solution to Dynamics
RaiseNow extends the Dynamics data model with various fields. Please download the solution from our latest release and import the solution in Dynamics as documented here.
Configure Dynamics
RaiseNow will map certain values defined in RaiseNow to corresponding values in D365. The following values must be defined and provided in the onboarding process later.
msnfp_Transaction
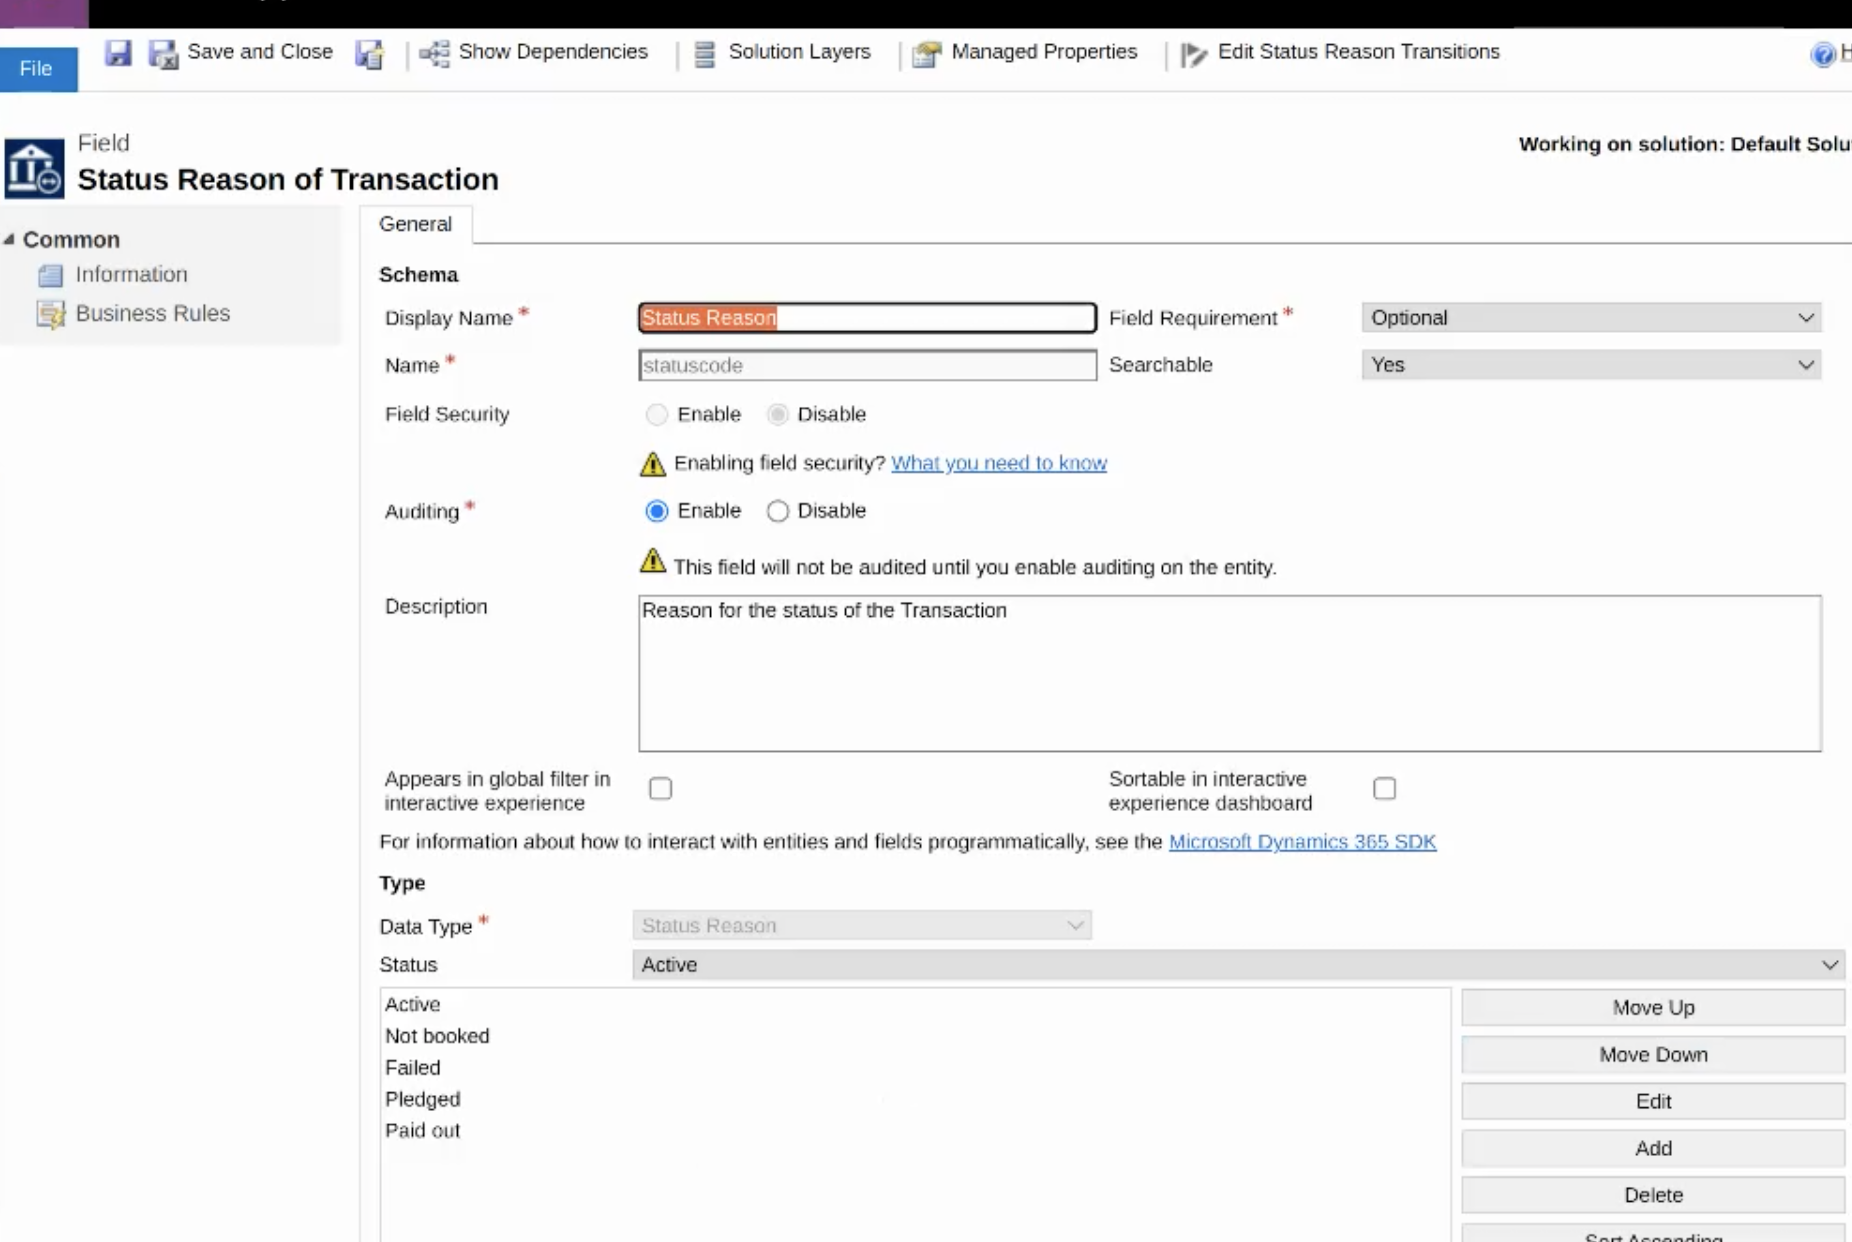
The field statuscode on the transaction must have values defined as shown in the screenthot below. Examples:
- If a pledge is created via RaiseNow (vs a paid-for credit card donation), RaiseNow will set the transaction status to "Pledged".
- If RaiseNow recognizes a payment has been paid out by the acquiring partner, the status of the transaction will be updated to "Paid Out"
msnfp_PaymentSchedule
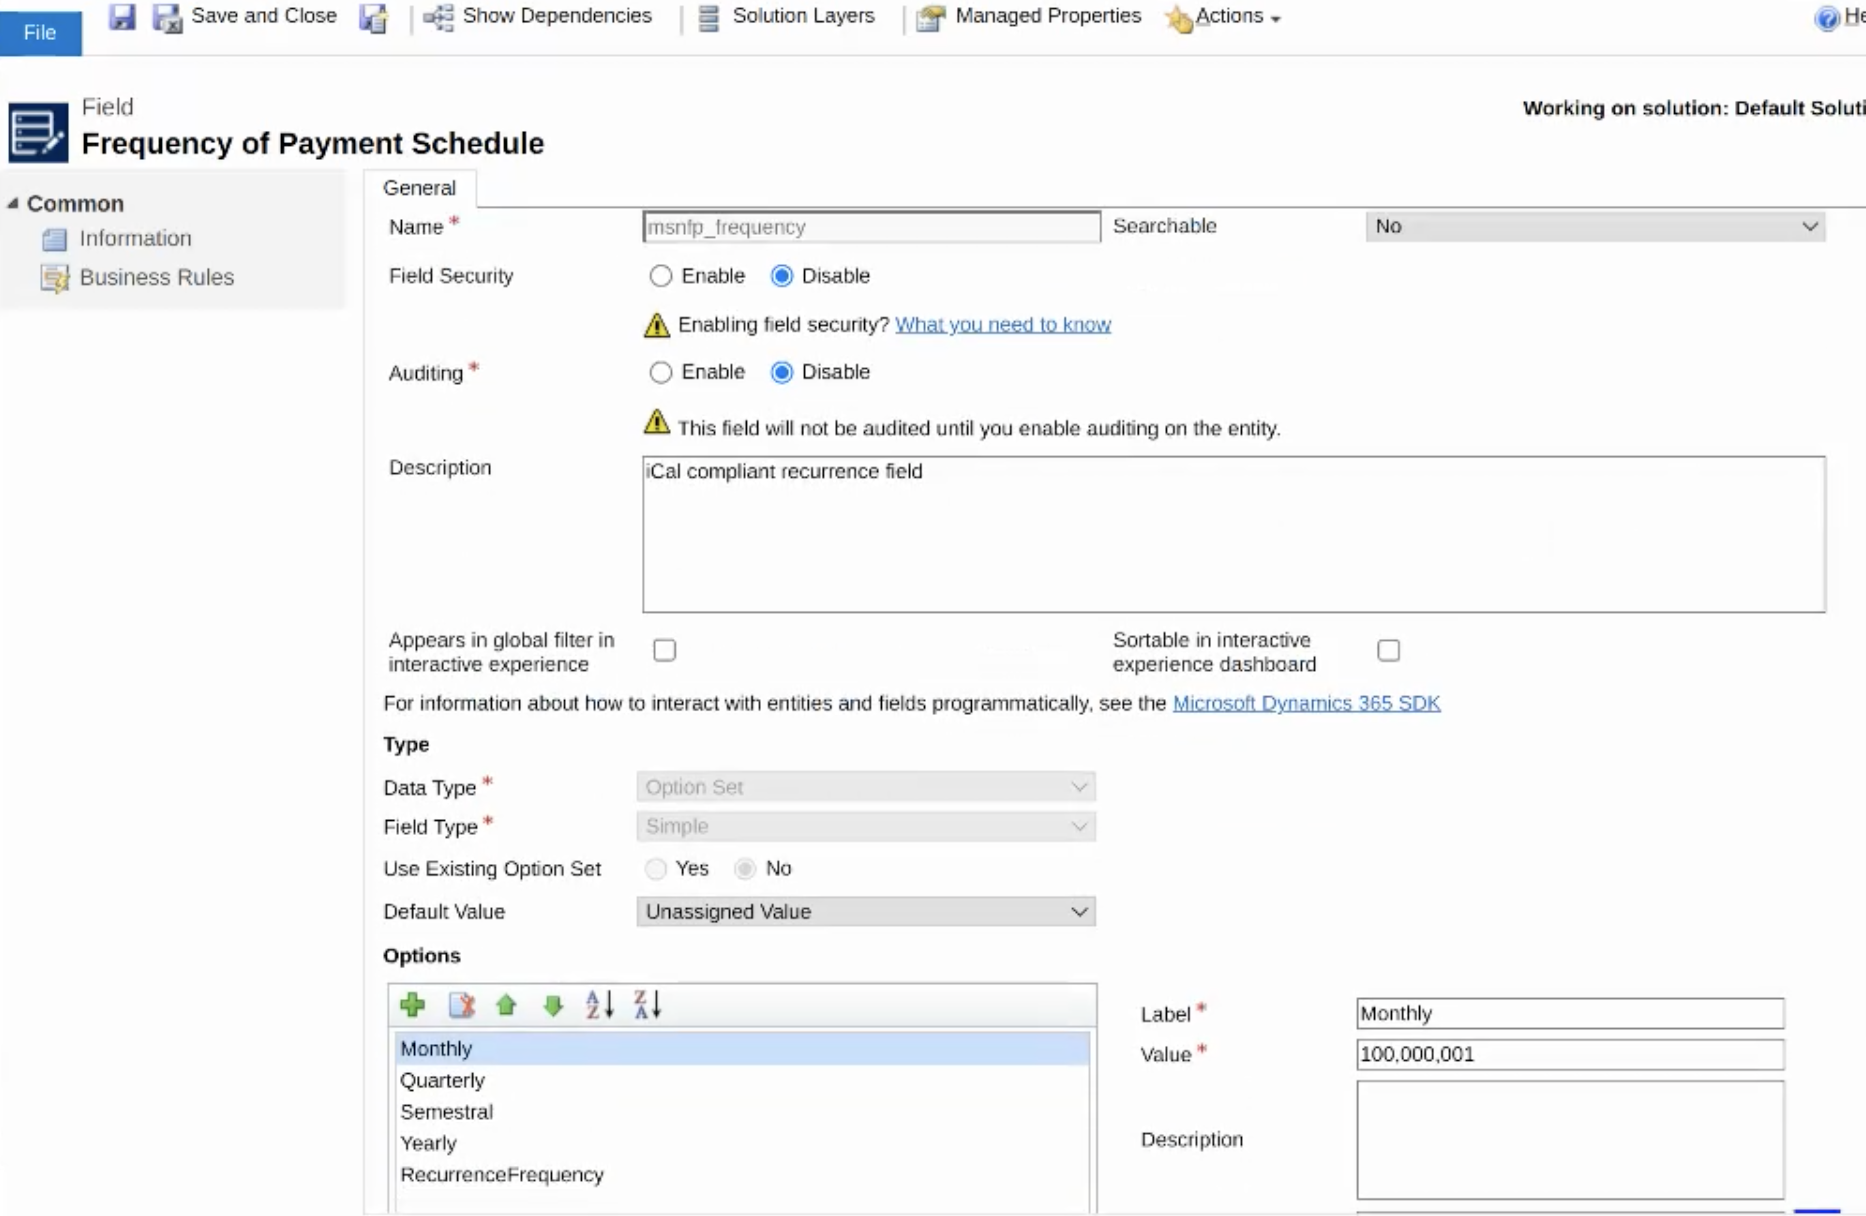
You need to add values to the msnfp_PaymentSchedule as shown in the screenshot below.
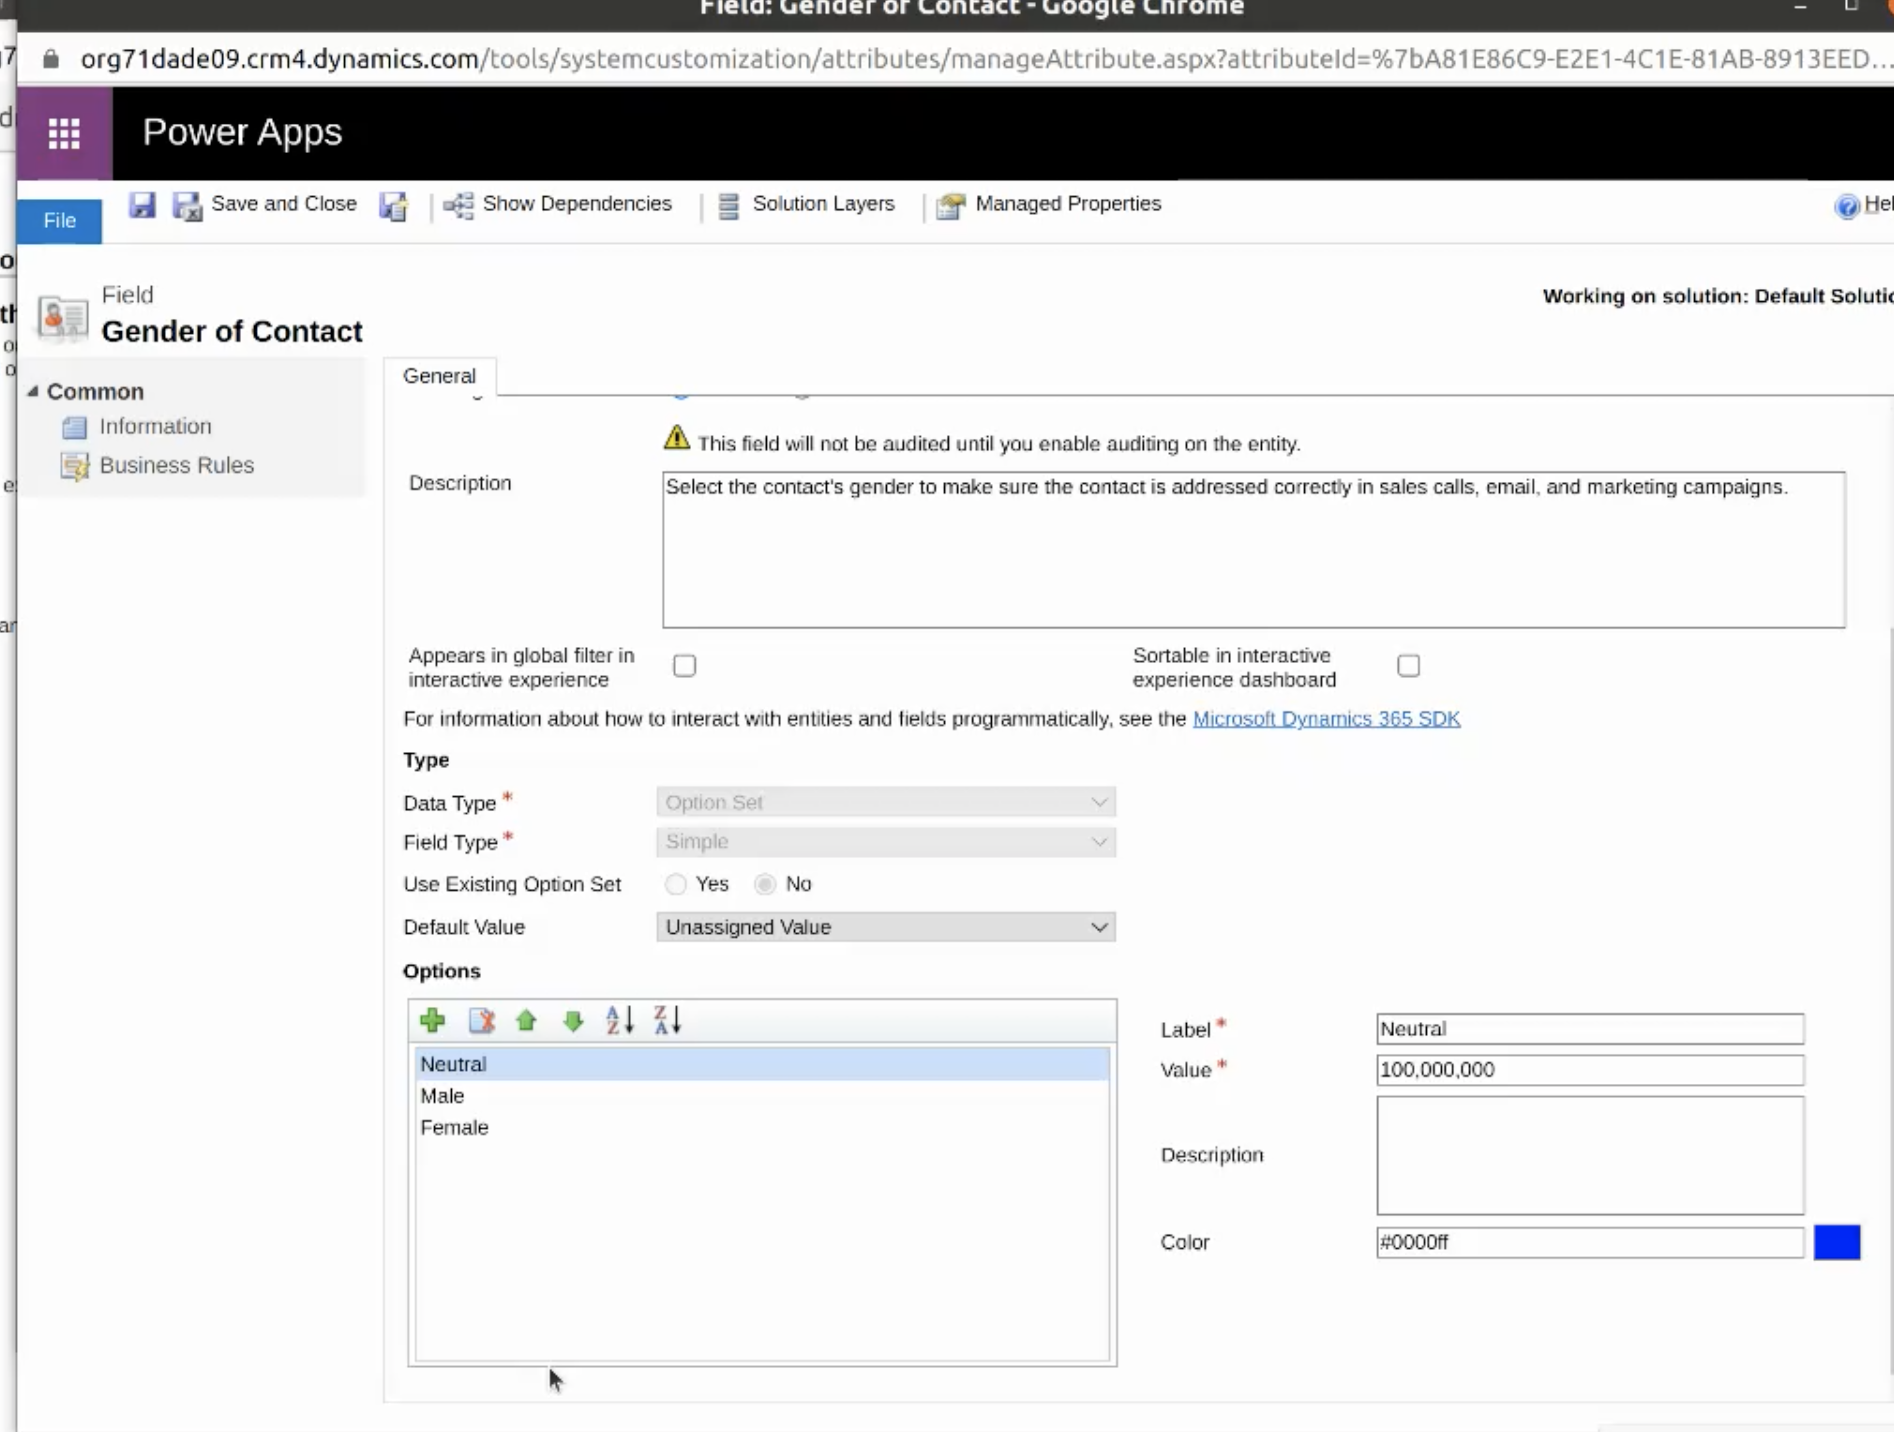
Contact
You need to add a value for the neutral gender option.
